www.rekrahcreative.com
I will also be posting this on there as well... it's one of my favorite tutorials! How could I not?? :)
Good Day Friends!!
Can you believe that it is already 33 days until Christmas!
I have been incredibly busy crafting my heart out! I feel so blessed to have so many people appreciate what I do enough to buy it from me! :)
One of my favorite crafts I have been making a lot of recently is the Shadow Box Variation. I saw it last year on pinterest and made a few that are similar as well as some of my own Creations! Today I am going to share with you how I make them, as I know a lot of people are eager to make their own decorations. (just like me!)
First here are a few pictures:
The first two images are from the original inspiration, a Shadow Box filled with Jingle Bells.
I have added my own flair of course and the boxes I use are 9" squared on the inside...
The Next two images came from walking through the isles in Michael's, 'awwing' and 'ooohing' over how cute the mini tree ornaments are.
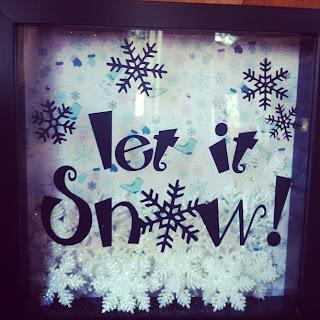
Finally the third variation was designed with my mom in mind who collects all things snow and snowman related.
These are unbelievably easy to make! Albeit a little pricey...
Here is what I do:
1. Gather Supplies:
- Shadow Box frame - $10 at ikea, comes in black or white
- Your choice of scrapbook paper - trimmed to 9" square
- Vinyl Lettering (Please contact me if you are interested in the designs I have! I can sell you the vinyl, or the design!)
- The Trinkets for each Box;
- JINGLE box; 1 1/2 large packages of bells from Michael's (1 pack small 1 pack large bells) and one small pack of sparkly bells
- Merry and Bright Box; 1 large box of multicolored mini ornaments, 1 small box of striped/dotted ornaments, (more if you want)
- Let it Snow Box; 1 package large craft snowflakes, 1 package small crafting snowflakes
3. Place box upside down and fill with desired amount of trinkets.
4. Trim paper to appropriate 9" size, (I usually trim mine closer to 9.25" so it fits firmly in the shadow box) Place behind the trinkets and close up your box!
Enjoy! Your done!
These make great gifts but cost me about $30 to make give or take on the box..
Please let me know if you have any questions! :) I also sell the boxes completely finished if you are into that.
Come visit me at my facebook page. I have a few more Shadow Box ideas on the go! ;)
Merry Christmas!
Linking HERE:


No comments:
Post a Comment